Showing posts with label diy. Show all posts

Thursday, January 12, 2012

All grown up!

I haven't related this story to you yet, though I have hinted at it.

Upon their arrival I gave my sister-in-law and her husband a little tour of our apartment. He had never seen it before; she had.

"It looks so much more grown up now!" She said when we got to the bathroom (a mere 15 ft from the front door).
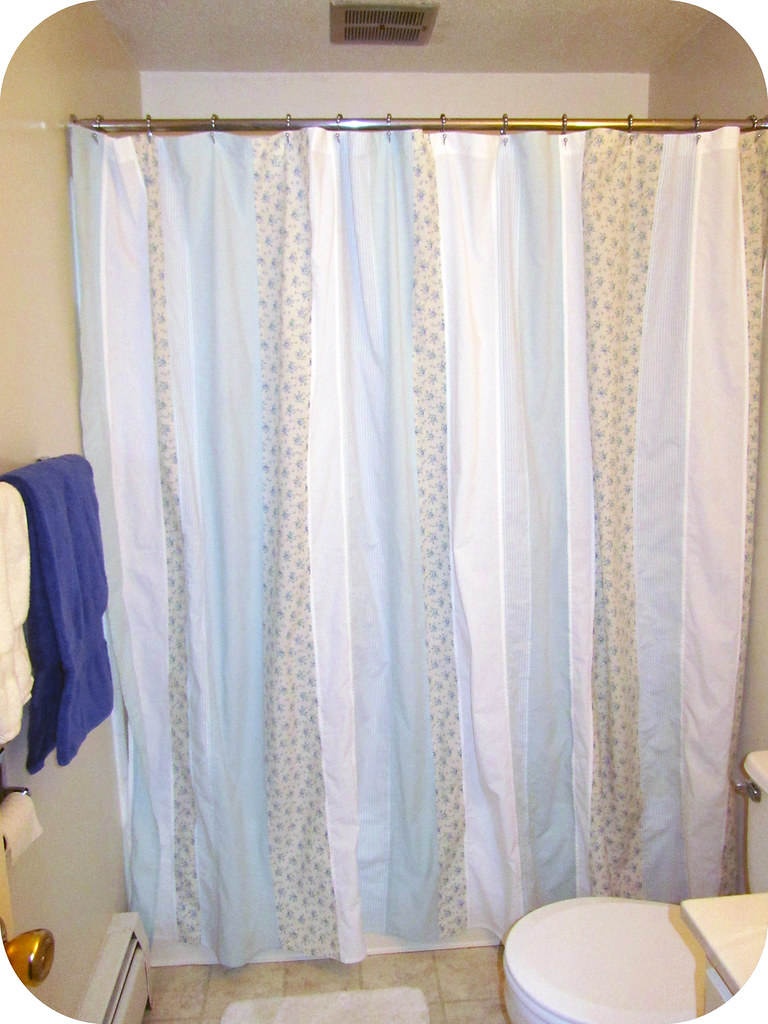
(I wish the walls weren't painted dingy yellow...)


That is not actually what she saw, but it is what she was supposed to see! Instead, she saw the liner minus my old rubber ducky plastic shower curtain that I had kept from my college apartment... Clear was a step up, I guess.

Confession: I still kind of liked the duckies even if they were a bit juvenile. I've actually stuffed the old hooks in a plastic bag with the thought that I could remove the rusty metal from the ducks and perhaps turn them into magnets... Not sure I will ever follow through, but I hated to throw them out. And I am using the matching washcloths to this day.

So, that is the tale of my new grown up bathroom. I'm really quite pleased with the results. I tore strips from sheets, then laid them out in a pseudo-random order (pseudo because they are not particularly random, but they are also without a repeating pattern). I sewed all the strips together and then decided that while time consuming, I would finish the seams that would be seen from in the shower. It surprised me how long the ironing took to achieve this... but nevermind. It is done now.

And it is my first finish (of hopefully 2 this quarter) for the FAL!

As explained in my FAL post, in my haste to make progress, I hemed it too short. I thought about trying to take a short cut and not rip out both top and bottom hems, but it didn't take as long as I'd expected. (I did take out both.)


Step 2


I wound up with a 3/8" bottom hem and a 1 3/4" top hem. Originally, at the top I had 3 layers of fabric to be sure the buttonholes would be secure, but the edit down to just two seems to have worked perfectly well.

Since my shower curtain is a bit wider than a standard one so I couldn't transfer the hole placement from the liner; instead I did some quick calculations and marked each with a pin.
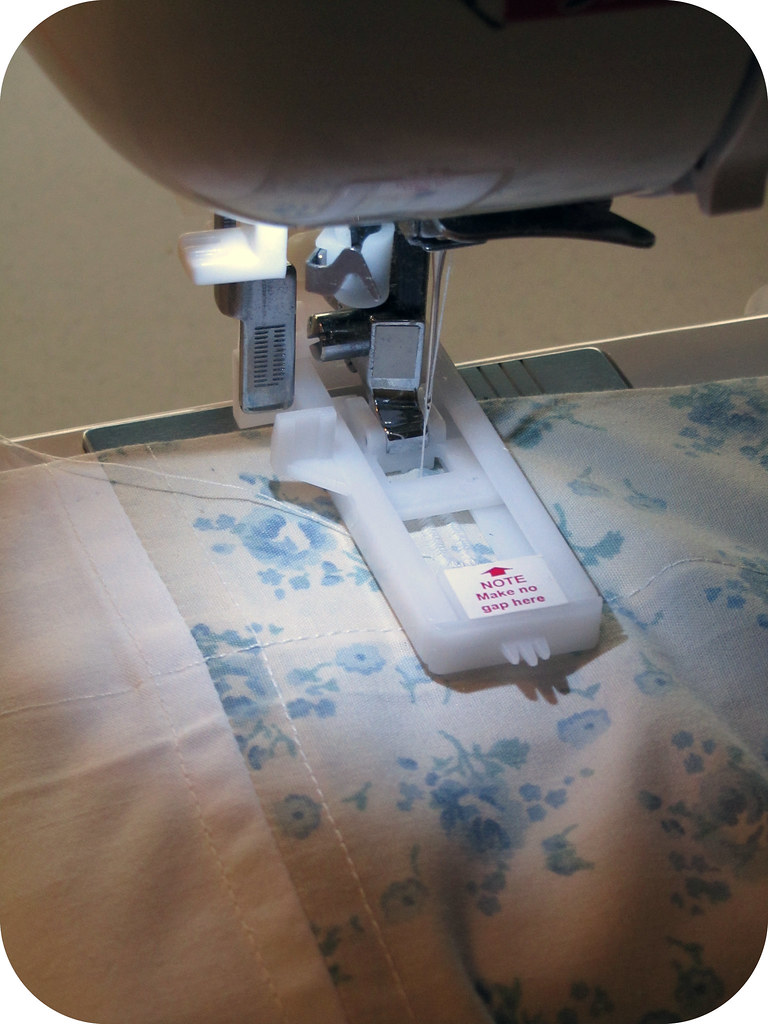
Step 3


Then I tested out the buttonhole feature on my machine for the first time. It worked like a charm! I used small pencil marks to keep my starting points evenly distanced from the hemline which were easily covered up by the stitches.
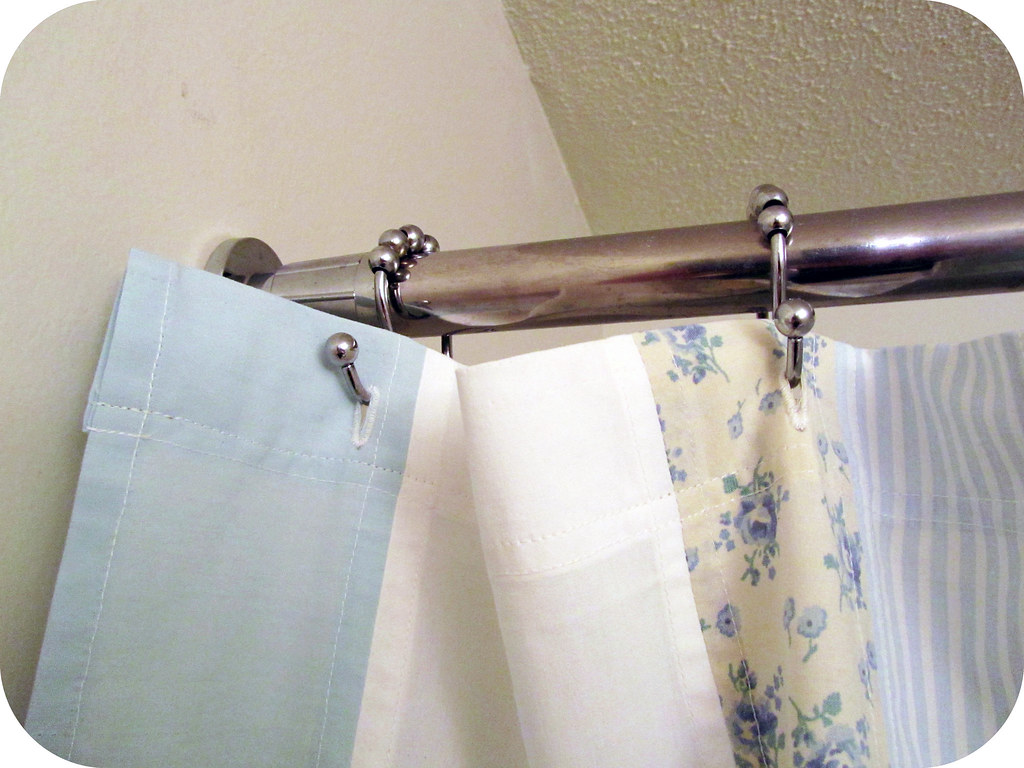
Step 4


And finally I cut the buttonholes and hung it up! Can you see the stitch detailing?

Thursday, December 29, 2011

Thrifted Thursday

Here's a Christmas present that didn't get made:


These two 100% wool sweaters cost me $5.70.

I meant to use them to try out a pattern (or several) from Countryside Softies. I got the book out of the library, but I like so many of the animals I should probably just buy it.

My niece received a sewing kit last year from my sister-in-law complete with lots of notions and I thought it would be brilliant to give her all the pieces and directions to make her own little animal this year! The problem was I ran out of time to assemble the parts, let alone test the pattern to be sure the directions would make sense to her... Perhaps it will work out as a birthday present.

Instead we gave her an origami flower set. And a flock of cranes I made as hanging decor for my college apartment. I felt bad throwing them away at the end of school so they waited in a paper bag until now. I think it was quite a hit as I spent at least an hour Monday afternoon assisting as all three kids made various types of birds, a frog and several sleds with the extra pile of origami paper also found in the bag.

Isn't this little emblem cute?

Friday, December 23, 2011

Finished!

Well, I'm posting this a bit later than I had intended. Truthfully, the table has been finished for a couple weeks now. It was the surroundings for the photo that weren't... Anyway, I've been working really hard to get the apartment ready for the holidays and apparently it's down to the last minute. All the relatives will be arriving tomorrow evening!

Here is the side table installed in my sewing room the guest room:


A chronicle of my process:

As purchased, dirty and stained.
Sanded and primed.


Even the back.


Epilogue:
In January, I plan to reconfigure our furniture again.

The futon will return to the living room while the large (ugly) dining table will be moved to the sewing room since it is the best available surface to sew large items on. (You can expect to see my first attempts at quilting!)

And this lovely little side table will be moved into my room. I can't wait to snuggle under my blankets with a cup of tea and a good book!

Friday, December 16, 2011

Presents!

Made by me!

I'd seen Pay It Forward around here and there, but never in time to be one of the first 3 commenters.

Until yesterday at A Sometimes Quilter.

The concept is easy. If you find a Pay It Forward post AND you blog too AND you are one of the first three commenter's on the blog post that tells you about Pay It Forward, the blog owner will make something especially for you.


Here are the details:

1. Important! You have to have a blog.

2. I will make a little something for the first 3 blog owners who comment on this post. It will be a surprise and I will make it and send it to you some time during the next 365 days after you have commented. 


3. Make sure you let me know your email address, or that you arent a no-reply blogger so that I can get your contact details.

4. To get a handmade present from me, you have to play too! This means YOU pledge to send a little handmade something to 3 readers of your blog. It doesn't matter what you give, as long as it is handmade by you!

5. Once you comment here, you need to post about your Pay It Forward on your blog (within 48hrs) to keep the fun going! You can just copy the rules from me and please include the Pay It Forward badge in your post. Also, feel free to join the 
Flickr group to see what else is being sent!


Note: If you want mail you'll be happy you opened, please help me get to know you a little bit and learn what would make you smile! I'm looking forward to reading your blogs and checking out any other related accounts (flickr, pinterest, etc...) you have in order to plan what to make for you!

Thursday, December 8, 2011

Thrifted Thursday

Does luck at thrift stores come in spurts? It sure seems like it. I've been searching for furniture for our (sparce) apartment since we got married over a year ago and only in the past few weeks have I actually been finding things I like. (Of course this only adds to my list of things to do before company arrives.)


On my last trip I found a small side table. $5.66, including tax!

Second find in about as many weeks!


I like the legs and the fact that the drawers have tracks on the underside so they stay flat when you pull them out (at least to a certain point). It seems to have some water marks here and there; I'm not sure how they came to be on a vertical surface... I think the worst part is a sticky fake wood grain print protective thing over the top. I'm guessing its mylar, but it could be plastic. Either way, I am removing it. I'd hoped it would peel off in just a couple pieces, however it is old and brittle so I am scraping it off with a carving tool left over from my architecture student days.

Sunday, November 20, 2011

Finished!

Finished!


This was some pretty quick turn around, if I do say so myself.

This morning I put the final coat of paint on. Luckily, the weather has been cooperative for the painting phase. It was above 50 degrees and the predicted rain showers were not scattered in our neighborhood.

Yesterday I spent several hours sanding down wood filler (smoothing out the front where fake drawers and doors had been scored) and putting on a coat of primer.

Here I am!


My balcony - aka workspace.


In preparation for moving the chest into the bedroom, I reorganized my casual clothes. All my tshirts, jeans and sweatshirts had been on shelves in the very spot the chest now sits, while blankets were jammed to the ceiling on the closet shelf. In the process of swapping storage areas, I purged 3 bags of clothing I no longer care to wear! This feels great except for making it painfully obvious that I wear nearly the same outfits every week. (Not on the same day every week at least.) Anyway, I plan to get some new things soon.

All settled in.

Thursday, November 10, 2011

Thrifted Thursday


Cedar Chest


The total was $20 including an old blanket to cushion it in the back of the truck.

Anyway, I plan to take off all the ugly bits, apply some new paneling and repaint it black, probably satin finish.

The interior looks so much nicer!


Then I just need to finish some quilts to fill it right?