

Upon their arrival I gave my sister-in-law and her husband a little tour of our apartment. He had never seen it before; she had.
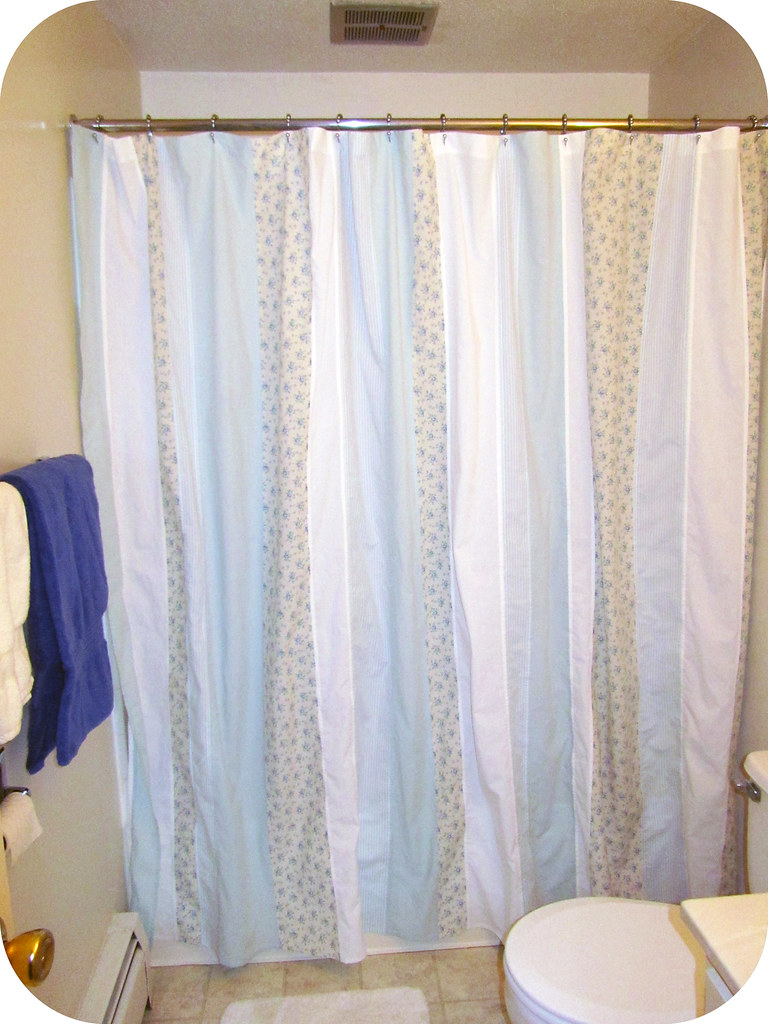
"It looks so much more grown up now!" She said when we got to the bathroom (a mere 15 ft from the front door).
 |
| (I wish the walls weren't painted dingy yellow...) |
That is not actually what she saw, but it is what she was supposed to see! Instead, she saw the liner minus my old rubber ducky plastic shower curtain that I had kept from my college apartment... Clear was a step up, I guess.
Confession: I still kind of liked the duckies even if they were a bit juvenile. I've actually stuffed the old hooks in a plastic bag with the thought that I could remove the rusty metal from the ducks and perhaps turn them into magnets... Not sure I will ever follow through, but I hated to throw them out. And I am using the matching washcloths to this day.
So, that is the tale of my new grown up bathroom. I'm really quite pleased with the results. I tore strips from sheets, then laid them out in a pseudo-random order (pseudo because they are not particularly random, but they are also without a repeating pattern). I sewed all the strips together and then decided that while time consuming, I would finish the seams that would be seen from in the shower. It surprised me how long the ironing took to achieve this... but nevermind. It is done now.
And it is my first finish (of hopefully 2 this quarter) for the FAL!
As explained in my FAL post, in my haste to make progress, I hemed it too short. I thought about trying to take a short cut and not rip out both top and bottom hems, but it didn't take as long as I'd expected. (I did take out both.)
 |
| Step 2 |
I wound up with a 3/8" bottom hem and a 1 3/4" top hem. Originally, at the top I had 3 layers of fabric to be sure the buttonholes would be secure, but the edit down to just two seems to have worked perfectly well.
Since my shower curtain is a bit wider than a standard one so I couldn't transfer the hole placement from the liner; instead I did some quick calculations and marked each with a pin.
 |
| Step 3 |
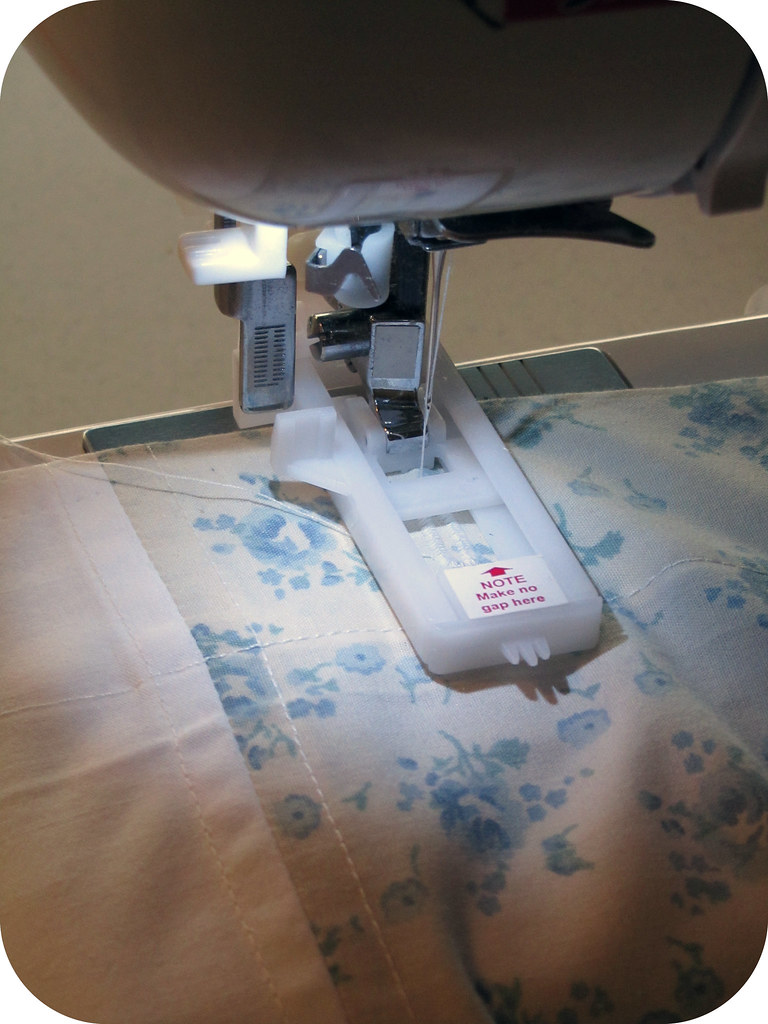
Then I tested out the buttonhole feature on my machine for the first time. It worked like a charm! I used small pencil marks to keep my starting points evenly distanced from the hemline which were easily covered up by the stitches.
 |
| Step 4 |
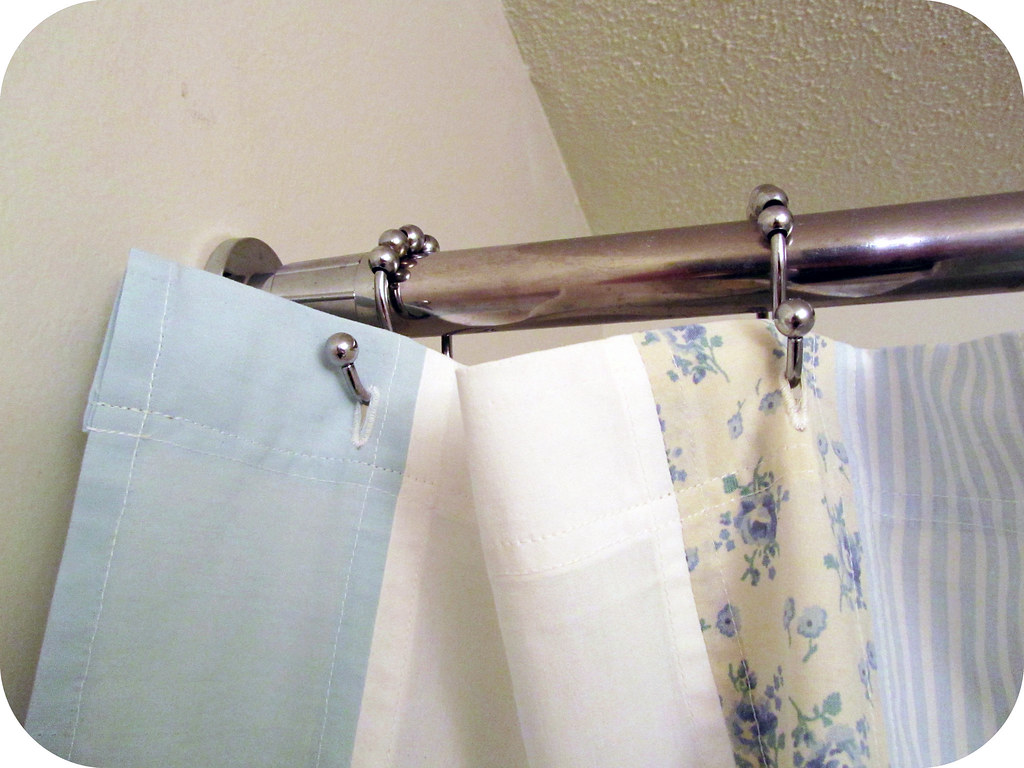
And finally I cut the buttonholes and hung it up! Can you see the stitch detailing?
It looks amazing. Great job. I have to agree with SIL much more sophisticated than rubber duckies. LOL Congrats on a tick off the list!
ReplyDelete